
You can create your own wrapped loops!
The photographs are of work with 20 gauge wire, although the technique can be used with other gauges of wire.

You’ll use three tools:
1. Round-tipped pliers sometimes called “rosary pliers”
2. Chain-nose or ‘straight’ pliers
3. Good flush cutter (a wire cutter capable of cutting cleanly, the best you can afford)

To start a wrapped loop, bend 1-1/4” of wire at an L-shaped angle with your chain-nose pliers.
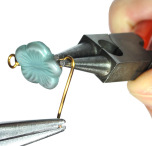
Right at the bend, grip gently between jaws of round-tipped pliers. Bend the angled inch of wire over the top of one of the round-tipped pliers’ jaws.

You’ve made the top part of the loop, now make its underside. Take the top jaw out of the wire. Wrap under and around the lower jaw to form the underside.
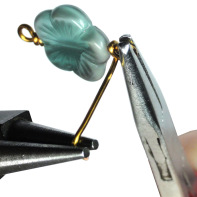
Hold the loop in a gentle grip with your chain-nose pliers, lengthwise. With the very tip of your round- tipped pliers, grab the little tail and wrap twice, two neat wraps at the base of the loop.
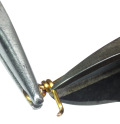
After you’ve wrapped the loop, use your flush cutter to trim off excess wire.
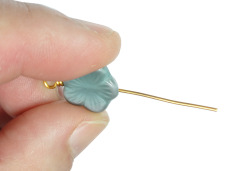
If you’re making a link with wrapped loops on either end: thread the bead onto the wire with the wrapped loop you’ve just made, and pinch the bead so that its base is firmly against the wrapped loop.

Bend the wire coming out of the bead at an angle, wrap over top and bottom of the jaw of the round-tipped pliers and wrap twice around, just as you did at the beginning of making the link. Work step-by-step, and use the proper tools at each step, and you will have consistent and attractive wrapped loops.